How to Use Amazon’s Inventory Reports: Active Listings and Cancelled Listings
By Joshua Price
As we settle into 2017, it certainly looks to be a year of change in every area. I’m personally very excited about the growth and changes we’ll be seeing this year in technology, customer behavior and marketing. As business owners we’re all conscious of our markets, target customers and geographies. Regardless of your size, it’s really important to stay up to date with all the changes happening in this space.
One of the most useful products of the technological revolution of the last 25 years has been the ability to handle, record and report on vast arrays of information. Customer data has been a crucial part of online marketing for a long while now. Cookies, for example, are abundant online, and if I collected real cookies at the speed I consume digital ones, I’d be as wide as I am tall (and I’m really tall).
So today we’re going to discuss data. Specifically, I’m going to draw attention to some of the most important inventory reports that Amazon provides: the Active Listings Report and the Cancelled Listings Report. These reports are core to some of the services my company provides and I cannot stress enough how important it is that you use them.
Active Listings Report
How to generate this report
In Seller Central, hover over Inventory then select Inventory Reports.
On the Inventory Reports page, use the drop-down menu to select the report you want. So in this case select the Active Listings Report then click Request Report to request the data from Amazon.
Note that the report will not appear straight away – it takes time to generate. Once it’s ready, you’ll be able download it to your computer using the links in the Check Report Status & Download section.
The report will download as a .TXT file, which will open by default in a plain text editor like Notepad. To make sense of the data, you will need to right-click the file then select Open with to load it into Microsoft Excel.
What the report contains
There are 27 columns in this report, however for most basic items, only 14 or so of them will be populated with data.
Here’s what they are and what they mean:
item-name – This is the product title, as displayed on Amazon. Only 80 characters (including spaces) are shown. Longer titles are cut off.
item-description – This is the product description for the item, as displayed on Amazon. Only ASINs you’ve created will show, so “piggyback” listings will not display a description, unless you’ve contributed one to Amazon.
listing-id – This is the internal ID for Amazon to track the listing. It can be seen when manually editing a listing in Seller Central.
seller-sku – This is the SKU you allocated to the listing or that was automatically generated by Amazon upon listing creation.
price – This is the price of the item. Note that no currency is shown.
quantity – This is the quantity of stock available on Amazon currently (reserved stock for pending orders is shown in a separate column).
open-date – This is the listing creation / open date. Format: YYYY-MM-DD HH-MM-SS.
product-id-type – This is the type of ID you used when creating the listing or offer. The code will be 1, 2, 3 or 4. The most common are 1 (for ASIN) and 4 for (UPC/EAN).
item-condition – This is the condition type selected. The code runs from 1 to 11, and the most common is 11 (New).
asin1 – This is the ASIN for the item.
will-ship-internationally – This and the other columns next to it refer to shipping settings for this item. 1 = Yes, and 0 = No.
product-id – This corresponds to product-id-type. It’s the actual value of the product ID, such as an ASIN, UPC/EAN, ISBN etc.
fulfillment-channel – This is the setting for fulfillment. Mainly you will see “Default” meaning Merchant Fulfilled, or “Amazon” meaning FBA.
How to use the report
Thanks to the varied information in this report there are many applications for the data. One of the most common is editing, updating or deleting listings by entering the data into an Inventory Loader File (more on that in a moment). You can also use it to update your stock management software or own spreadsheet with current stock levels.
As this is an active listings report, it only shows active listings – not inactive or blocked ones. That means it can also be used to ensure an item is listed correctly and available to buy on Amazon.
I work with clients on a variety of tasks, and this is the report I ask for the most. It’s a quick way, in combination with a business report, to get a solid overview of a selling account. It allows for an understanding of products, stock availability, price and more.
How are some of my top tips for making use of the Active Listings Report.
Tip 1: Bulk editing dispatch latency
One of the changes you could make, and can be a brilliant tool during busy periods, is changing your lead time to ship orders. This gives you more flexibility with shipping times, avoiding warnings or costly suspensions.
Here’s how to do it:
Download your Active Listings Report as above.
Download the Inventory Loader File template (go to Inventory, Add Products via Upload, then follow the instructions on the page).
Copy the ASINs and SKUs from your Active Listings Report into the corresponding columns in the Inventory Loader File.
On the Inventory Loader enter your new dispatch latency in the leadtime-to-ship column. The default on Amazon is two days (simply “2”). I recommend entering 3 days to 5 days during peak times (just enter “5”) if you are at risk of not meeting the two-day lead time.
In the “update–delete” column enter “U”.
Save as a “Text (Tab delimited)” file from Excel. Say OK to losing any non-compatible changes.
Upload in Seller Central.
Without using the Active Listings Report to get this information, it would be impossible to quickly and easily update your dispatch latency like this. A seller’s worst nightmare during peak times is losing their selling privileges, so make sure you keep on top of your lead time and increase it if you need to.
Tip 2: Bulk edit sale prices
The same idea works for putting items on sale.
Download an Inventory Loader File (it may need to be specific to your category), make the changes, and upload. You can enter a discounted price for a period of time – maybe a month for a seasonal sale – and the price will only apply for that time.
This is an easy way to help shift stock that’s stagnating, or give an extra boost to a popular line.
Tip 3: Weed out old stock
Many sellers have had their Amazon accounts for years, selling a range of items. It’s easy to accidentally leave an old, out-of-stock or discontinued line live on Amazon.
In my work with suspended Amazon accounts, I often see inauthentic or rights owner complaints focused on ASINs the seller hasn’t sold in months or years, but were still live in their account.
It’s important to keep your inventory clean in Amazon, because anything that you are not actively selling is a liability. You only need one unit “accidentally” left in stock and you could be suspended for selling inauthentic products – you won’t have an invoice from the last 180 days to show otherwise!
So I suggest using the Active Listings Report to periodically review your listings on Amazon and ensure there’s no old or incorrect stock still sitting there.
Cancelled Listings Report
We’ve covered how you can use the Active Listings Report, but it’s not the only inventory report you can exploit.
Let’s have a look at how the Cancelled Listings Report can be used.
How to generate this report
Unlike the Active Listings Report which is accessible directly through Seller Central, you have to ask for the Cancelled Listings Report to be added to your account.
Contact Seller Support to request the report. Be sure to tell them how often you want it to be generated. I once didn’t specify how regularly I wanted the report, and they set it to every 5 minutes! I received non-stop notification emails, “A new report has been generated”, for 48 hours until I could get the setting adjusted to once per day.
What the report contains
The Cancelled Listings Report looks exactly the same as the Active Listings Report above.
There’s no indication of why a listing was blocked, but you should be able to find that out by checking your performance notifications or Account Health dashboard.
How to use the report
The Cancelled Listings Report allows you to look at all the listings Amazon has cancelled (blocked) or that you’ve made inactive. This is useful for obvious reasons: you can quickly identify which listings are inactive and either fix the problem or remove the listing completely.
The Cancelled Listings Report is another great tool in the efficient running of your Amazon account, allowing you to rectify problems quickly and get your items back on sale.
I recommend using it often to keep on top of your inventory.
Wrapping up
In recent years we’ve all benefited from the growth of ecommerce – and Amazon’s growth specifically.
But with more customers and revenue coming to the marketplace, we’ve also seen an increase in sellers and competition. The value of information that can help us to get ahead and beat the competition – like these reports – is ever increasing.
I hope you’ve found this post useful, and I’d be happy to answer any questions you have about Amazon reports in the comments below.
(SOURCE)

Showing posts with label amazon inventory. Show all posts
Showing posts with label amazon inventory. Show all posts
Saturday, 4 March 2017
Thursday, 1 December 2016
Amazon FBA UK How to prepare Amazon inventory shipments tutorial
- Tutorial video on how to prepare Amazon inventory shipments on Seller Central!
Monday, 28 November 2016
Distributed Inventory Placement vs Inventory Placement Service for Amazon FBA Sellers
By Erik Matthes
Did you know that Amazon has the right to move your FBA inventory between its fulfillment centers without alerting you? And, that Amazon can split up your FBA shipments between up to three different fulfillment centers? No, we’re not making this up. And, yes, this has probably happened to you already. It has to do with something called “distributed inventory placement,” a standard setting on all FBA accounts.
If you haven’t edited the “Inbound Settings” in your Amazon account, you’ve likely had your products shipped to multiple fulfillment centers instead of just one.
“Why on earth would Amazon do this?” is what you must be thinking to yourself.
The good news is that several logical reasons exist for Amazon Distributed Inventory Placement and fulfillment center transfers.
According to Amazon:
“By default, when you create a shipping plan, your shipment may be divided into multiple shipments, each directed to a different fulfillment center. This division is called distributed inventory placement.
“Units of an ASIN will be sent to a maximum of three destination fulfillment centers in the U.S. The destination fulfillment centers are selected based on the products you’re shipping and where you are shipping from.
“By having your inventory spread across multiple fulfillment centers across the country, the person who buys your product will receive it faster than they would if your inventory was in a single fulfillment center farther away from the buyer.”
We’ve had many customers ask us about this, and we’ve seen questions about this in Amazon’s Seller Forums. So, we decided to help sellers understand Amazon’s rationale behind the process.
Read on to learn more about Amazon Distributed Inventory Placement, how you can work around it, and how Appeagle is helping Amazon sellers make the most of it with our enhanced “Get the Buy Box” algorithm.
Amazon Distributed Inventory Placement explained in a story
The best way to understand why Amazon does Distributed Inventory Placement is the story of Amazon seller Andrea G.
Based in Maine, Andrea uses FBA to fulfill orders on a variety of outdoor products, including several for warm weather. These include some of her best-selling charcoal grills, typically used for summer cookouts.
When Andrea signed up for FBA, Amazon gained the right to make executive decisions on where to ship her inventory. The “Distributed Inventory Placement” setting is the default on every FBA account, allowing Amazon to split shipments into up to three destination fulfillment centers.
Once winter arrives, most of the U.S. is not looking to buy Andrea’s grills. But, thereare some regions that stay warm enough for outdoor grilling year-round. So, if Andrea sends a shipment of grills to FBA before the winter, Amazon will likely split that shipment across multiple fulfillment centers instead of just storing it in the one nearest to Andrea.
Unfortunately, Amazon passes this cost back to Andrea, who must pay for shipping to up to three fulfillment centers instead of just one. Clearly, this can have a severe impact on costs and margins.
And, if Andrea has grills already in FBA inventory in a fulfillment center close to her home in Maine, Amazon has the right to transfer them to fulfillment centers closer to the areas where more people are likely to purchase them during the winter, like Florida and Southern California. So, when customers in Miami or L.A. go to purchase a grill on Amazon in January, they’ll receive it super fast because Amazon transferred it to a closer fulfillment center.
For these transfers between fulfillment centers that occur after her initial FBA shipment, Amazon (thankfully) covers the cost.
Why Amazon splits FBA shipments and transfers products to different fulfillment centers
There are three main reasons why Amazon will split FBA shipments and/or transfer your items to different fulfillment centers:
• Seasonality
• Demand
• Demographics
In the example of Andrea G., you see how seasonality can play a part in this process. The grilling season ends in most of America after September. But, Amazon understands that certain parts of the country will see people barbecuing year-round, and it adjusts the inventory at its fulfillment centers to reflect this.
Amazon also understands that demand may differ from region to region. So, Amazon may transfer products from a NY-based seller to fulfillment centers near the west coast if it finds that those products sell better in California.
Lastly, demographics may also lead Amazon to transfer your products to another fulfillment center. For example, if more people are purchasing your winter coats in Minnesota than New Jersey, Amazon may shift some of your inventory from a Northeast fulfillment center to one in the Midwest.
The common thread between these examples is that Amazon thinks shifting your inventory will result in you making more sales.
How Amazon sellers avoid extra shipping costs from Distributed Inventory Placement
Sellers who want to avoid the cost of shipping to multiple fulfillment centers do have a workaround called “Inventory Placement Service,” but it’s limited. With Inventory Placement Service, you’ll only have to ship each ASIN to one fulfillment center.
To switch your settings to Inventory Placement Service, follow the steps below:

Doing this switches your account settings from Distributed Inventory Placement to “Inventory Placement Service.” As Amazon puts it:
“If you sign up for the Inventory Placement Service, we will assign you a single Amazon fulfillment center to which you can send all units of a specific ASIN in a shipment. A per-item service fee applies.
“When you use the Inventory Placement Service, the destination fulfillment center is determined by Amazon. You cannot choose the fulfillment center to which you send your shipment. The destination fulfillment center may vary from shipment to shipment. When your shipment arrives at the fulfillment center, it may be split and sent to different fulfillment centers for you.”
So, even if you opt for this change of service, Amazon will still select the fulfillment center at which your shipment will arrive.
And, with the way Amazon constructed its Inventory Placement Service policy, it will likely split your shipment up upon arrival anyway and ship portions to different fulfillment centers.
Amazon also only guarantees that they won’t separate individual SKUs, which is different from everything going to one fulfillment center.
Lastly, Amazon charges fees for Inventory Placement Service.
Here’s the breakdown of the fee structure:

It all boils down to this:
→ With Distributed Inventory Placement, you may have to pay added shipping costs upfront.
→ With Inventory Placement Service, you’ll only have to ship each ASIN to onefulfillment center. But, you incur a per-item fee on each shipment.
To determine if you should use Distributed Inventory Placement or Inventory Placement Service, figure out the costs of each.
If the per-item cost of Inventory Placement Service fees is less than the shipping costs you typically pay to ship your FBA products to multiple fulfillment centers with Distributed Inventory Placement, then you should probably make the switch.
How inventory transfers between fulfillment centers affect Amazon sellers
At this point, you must be wondering how these transfers between fulfillment centers after your initial shipment affect you. After all, Amazon doesn’t have to alert you, so these product movements can feel like they’re happening behind your back.
While these inventory transfer won’t directly affect your finances, they will affect your inventory levels.
Unless you constantly check them, you may think you have a certain amount of units in one fulfillment center when, in fact, you have less than you thought in that fulfillment center and you’re holding inventory in other fulfillment centers that you didn’t even know about.
Amazon will then hit your listings with “Backordered” status, although they’ll include an “expected restock” date. Unfortunately, you may miss out on sales in the near-term when this occurs.
How Appeagle’s “Get the Buy Box” algorithmic repricing strategy distinguishes between these two “Backordered” statuses
Appeagle’s Get the Buy Box algorithm strategically reprices your listings relative to the Buy Box price until you win the Buy Box yourself.
But, suppose you’re using this strategy on a listing that becomes Backordered due to Amazon transferring inventory between fulfillment centers.
In that event, Appeagle’s algorithm will recognize that your price should stay put until that listing reaches its final destination.
Your price will remain frozen until the item becomes shippable so that it doesn’t get priced down to its min while it was out of stock.
This price freeze helps you win the Buy Box at a higher selling price once you’re back in stock.
And for Amazon sellers, winning the Buy Box at a higher selling price is about as good as it gets.
Amazon FBA UK How to prepare Amazon inventory shipments tutorial
- Here's part 2 of the step-by-step tutorial video for Amazon UK inventory shipment
Sunday, 27 November 2016
Amazon UK Training: How to List inventory on Amazon UK FBA Tutorial
- Watch this step by step tutorial video on how to list inventory on Amazon UK
Saturday, 5 November 2016
The Importance of Not Overbuying Inventory
Usually when a client comes to us and wants to grow their business the first thing on their mind is “How can I source faster?” or “How can I source at a larger scale?” However, we have found that often times when business are growing a good first place to start to allow money to flow better in the business is to make sure that the inventory turn rate is healthy and that there is not a lot of stale inventory tying up capital.
Now, this isn’t nearly as fun to talk about as the newest trends in Private Label or “Hot Niches” but we have found it very valuable information not only for our clients. But for ourselves as well.
Stale Inventory Costs You More Than You Think!
If you are an Amazon seller than you probably know that any inventory you hold longer than six months gets charged a whopping $11-$22 a square foot in August and February. So there is a set cost to hold your inventory- even if it isn’t in your home.
If you store inventory where you live or in your warehouse- there is a cost to the space it takes up. Plus, there is the mental drain you get from seeing that inventory day after day. Knowing it will likely be there for months to come.
However, stale inventory costs you the most in lost opportunity…
When you have a backlog of stale inventory you tend to have capital- that could be used to buy items that you could turn several times. This compounds the amount that stale inventory costs you each month.
For example:
You have 100 small widgets that cost you $10 that you expect to profit an incredible $30 each for a total of $3000 profit. It takes you 6 months to sell through the widgets so no long term storage fees are accrued.
Your profit about $3000 off of your $1000 investment. You now have $4000 (original investment+$1000)
Instead you buy only twenty of those small widgets. You sell those in just over a month for a profit of $600.
You take the remanding $800 ($1000 investment- $200 in small widgets) and purchase in several other widgets that only give you a profit of 50%. You only buy a month or less of inventory. At the end of the first month you have an additional $400 in profit.
You now have doubled your money (profits + your original investment) ($600+$400+ $1000). You only find items with a 50% return for the reaming 5 months.
Month 2- (2000+1000)= $3000
Month 3 – (3000+1500)=$4500
Month 4 – (4500+2250)=$6750
Month 5 – (6750+3375)=$10125
Month 6 (10,125+5062=$15,187
At the end of the 6 months you now have $15,187. That is more than $11,000 more than if you had bought all of the higher profit widgets.
Now this doesn’t take into account that there are some additional expenses with turn inventory more times (time to source, prep, etc.). However, the point is to demonstrate that there is a cost for lost opportunity in over buying. Even if it is at a higher margin.
Saturday, 10 September 2016
How to Get Amazon to Pay for Your Destroyed Inventory
By Karon Thackston

Have you ever heard of Elaine Heney? I got an email from her a little while back. She wanted to discuss how her methods of getting reimbursements from Amazon had landed her over $6,100 that she didn’t even know she was owed. That got my attention!
Her process is so simple that I asked her to share part of it with you so you could see:
1. That Amazon isn’t always diligent about getting reimbursements to sellers for destroyed items.
2. That you may very well be owed a good deal of cash for inventory that Amazon has destroyed for one reason or another.
3. That you may also have money coming to you for damaged, lost or other types of inventory — IF you ask for it.
After going through what Elaine references below, I was sent a reimbursement email from Amazon telling me I’d gotten $68.80. It took about 5 minutes. Wanna give it a try? Keep reading! Take it away Elaine…
===========================================
I started selling private labels products on Amazon just under a year ago. Like most Amazon businesses I was working crazy hours researching new products, contacting suppliers, getting in samples, applying for brand registry, launching products on Amazon.com and in five European countries, handling customer service and making sure everything was running smoothly.
One thing I didn’t handle was my reimbursements. I knew from listening to the grapevine, that Amazon doesn’t always automatically process refunds if they damage or destroy inventory that you shipped to their warehouses. Sometimes Amazon loses products and occasionally Amazon can overcharge the FBA fees on products they sell.
On one hand, Amazon has a HUGE amount of units in all their warehouses so I understand how small things can fall through the cracks. From my FBA seller’s perspective, however, if Amazon owes me money because of missing or damaged stock, then I would really like to get the reimbursement! Wouldn’t you?
If you have ever looked at the reports in Seller Central, you know they are not simple to figure out. So I sat down one day just to see if I could somehow get a handle on how much (if anything) Amazon owed me that they hadn’t paid me for.
Within a couple of days, I had received over $2800 back from Amazon USA & Amazon UK. In another week, this figure had risen to over $6100 in missing refunds! Now, filing for various types of refunds is a part of my regular Amazon business routine and it almost always brings in additional cash that would have otherwise been lost. And all I had to do was ask!
Let me show you my ultra-simple process for determining if you have any inventory that Amazon has destroyed and how to get paid for it.
The first step is to check to see if they have reimbursed you for destroyed inventory already.
1. Log into Seller Central.
2. At the top of the page, hover your mouse over ‘REPORTS’ and click ‘FULFILLMENT’.

3. On the left of the screen, under ‘INVENTORY’ click on “show more.”

4. Click on ‘Inventory adjustments’.

5. Select: reason group = DESTROYED.
6. Select: event date= Last 365 days (or longer if you need to, whenever you started your business).

7. Click “generate report.”

8. Each order listed may (but not always) qualify for refund.
9. Take a screengrab (picture) of this Seller Central screen.
10. Then download the inventory adjustments report by clicking on DOWNLOAD. Select EXACT DATES, and put in the start date for your business (I put in the date before I started to sell on Amazon) and the end date (today’s date).

11. Save the downloaded ‘destroyed inventory’ file to your computer.
12. Open the file in a spreadsheet program and put a filter on the top row.
13. Look at the column REASON.
14. Use the filter so it only shows letter D and the number 5. These are some of Amazon’s adjustment codes. (See below.)
15. This is your list of destroyed products.

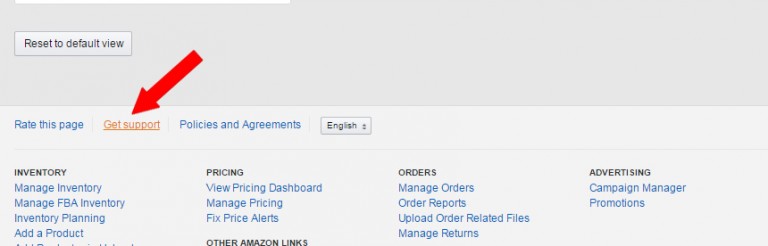
16. To apply for a refund, scroll to the end of the page in Seller Central and click on ‘Get Support’.
18. Click on ‘Selling on Amazon issue > FBA issue > Something else.’
19. Write Amazon this message:
Hello,
Could I get reimbursed for the items destroyed by Amazon? See the attached list of the inventory items that have been destroyed.
Thank you. Have a great day!
20. Attach either the downloaded ‘destroyed inventory’ file to the message, or attach the screengrab you took earlier.
21. Send the message to Amazon.
Amazon will usually reply within 24-48 hours.
This is Just 1 Way to Get Refunds from Amazon. There 8 More Methods!
When I started this process I had expected to only get back a few hundred dollars.
It completely took me by surprise to get back over $6,100, using this and 8 other methods that I have documented so far.
I’ve put together a full series of step-by-step, walkthrough videos and PDFs going through the exact process I followed to get over $6,000 back from Amazon USA & Amazon UK.
Choose from 3 Options Offering:
• Rocket Refund Manual for all 9 methods with screenshots & detailed guides
• Amazon FBA email templates that I used to claim over $6,100
• Full library of walkthrough videos showing every step of the process
• Private Facebook group so you can ask questions and share your successes
• Amazon FBA email templates that I used to claim over $6,100
• Full library of walkthrough videos showing every step of the process
• Private Facebook group so you can ask questions and share your successes
Get Rocket Refunds today and see how much $$$$ you get back.
If you have been selling on Amazon for more than 6 months there is a very good chance that Amazon owes you money.
Today is the day to claim those funds quickly and easily!
- Really good stuff to know! Leave a comment below!
Sunday, 4 September 2016
Fulfillment by Amazon FBA Inventory Management Tool for Amazon Sellers
- Need some help with your inventory? Watch this video!
Wednesday, 24 August 2016
HOW TO MANAGE LONG TERM STORAGE FEES WHEN SELLING VIA AMAZON FBA
By Ryan Grant

In today’s post I am going to be sharing my process for managing long term storage fees. These fees occur on August 15th and February 15th every year. On these dates, Amazon charges FBA sellers for items that have been in stock for 6 months or greater as of those dates.
First, I will go over the details of long term storage fees, and then I will dive into the strategies that I use to minimize the long term storage (LTS) fees I pay.
You can read all of the details about LTS fees direct from Amazon HERE. A few noteworthy takeaways if you don’t want to read through the full page:
- One unit of each ASIN is exempt from LTS fees each time storage fees are initiated.
- Units in stock for 6 to 12 months as of the LTS fee date will be charged $11.25 per cubic foot
- Units in stock for 365 days or more as of the LTS fee date will be charged $22.50 per cubic foot
Now, I will go over how to determine which items will be impacted by long term storage fees. Here’s my process:
- Login to your seller account
- Hover over reports and select Fulfillment
- On the left hand side of the screen under the Inventory heading, click show more
- Select Inventory Health
- Click the Download tab and click Request Download
- Download the report as it becomes available
- Open the text file that downloads
- Click anywhere in the text file and select all. This can be done by right clicking and then clicking select all, or can be done by holding the control key and pressing the letter A (Ctrl + A).
- Copy the data you have selected
- Paste this data into either Excel or Google sheets
- Select the top row, click the data tab, and select filter
- Then you will want to sort the columns with the heading “projected-ltsf-12-mo” and “projected-ltsf-6-mo” from high to low. For me these are columns AN and AU, respectively. Make sure to sort one column at a time.
Note: A similar report that will work for this instead of steps 1 through 5 is to go to Inventory > Manage Inventory > Inventory Dashboard > Inventory Age > Download Report
If you go through the above steps, you now have the info needed to analyze which items you will be charged storage fees on. The report you downloaded will let you know exactly how much will be charged in fees for each item as well.
Now, I will go over some of the strategies I use to make sure I don’t pay more in long term storage fees than I need to.
Pricing Strategies

About a month before a long term storage fee date, I will go through my inventory and begin to get more aggressive on pricing for items that will be charged fees. My first option is to get items sold so that I don’t have to pay an extra fee, and I don’t have to get the item sent back to me.
Use Amazon Promotions & Sponsored Product Ads
Another strategy I use about a month before is to run promotions and ads for items that will be charged fees. These items have fees coming either way, so it’s worth spending a little, or offering a discount to get them sold. If there is interest I will consider diving more into this topic in a future blog post.
Take Advantage of Free Removals
This year from August 4th through 14th Amazon is offering FBA sellers free removal orders to help clear some space in their warehouses. They have done this the past few times right before long term storage fees were initiated. It’s not a guarantee that this offer will be available again in the future, but it’s reasonably likely.
If you are reading this the day it is published, you still have 4 days to take advantage of free removals before long term storage fees are charged. There is one catch with these removal orders, and that is that you will be unable to send in additional units of the ASINs you remove for a period of time. For the August long term storage fees, items of the same ASIN cannot be sent in again until January 1, 2017.
Manage In Stock Levels from the start
One of the best ways to avoid long term storage fees is to manage the amount of inventory that you send in to FBA warehouses in the first place. If you only send in quantities that are likely to sell in 6 months or less then you should have minimal long term storage fees to worry about.
Time When You Send in Inventory

One other thing that can be done is timing when you send in your inventory to FBA warehouses. For example, on August 15th you will be charged a long term storage fee for items that have been in stock for exactly 6 months. However, you will not be charged for items that have been in stock for 5 months and 29 days. So if you have items hit the warehouse on say August 20th, you have nearly a full year before you will be charged LTS fees. This is as opposed to having an item hit the warehouse on August 14th, then you will only have 6 months and a day before a LTS fee will be charged.
Essentially, you can save some exposure from fees by strategically timing when items are sent to FBA warehouses.
Determining Which Items to Remove

Most likely when it comes up to the day before long term storage fees, you will still have some items that you were not able to sell. That means it is time to figure if you should pay the long term storage fee or if you should have the item sent back to you. I generally go through this process as close as possible to the date of long term storage fees. Generally this is 1 or 2 days beforehand.
The first step that I take in this process is determining what my costs are for having an item sent back to my location. I want to calculate the time it will take me or someone on my team to go through an item, store it for 3 to 4 months, the time to process it again to be sent back in, and the cost of inbound shipping & supplies to send it back in. This gives me a baseline to see what level of fee it makes sense to pay.
When there is a free removal promotion available, I typically will pay a LTS fee on any item where the fee is $1 or less. If there is not a free removal promotion available, I will typically pay the LTS fee on any item where the fee is $1.50 or less.
I say typically, as there are exceptions to this. For example if I have a toy that sells for $100 that is very likely to sell in December, I would be likely to pay a much higher storage fee in August. If I was to remove it, I would lose the opportunity to have the item sell as I wouldn’t be able to send it back in right away.
On the flip side, if I have an item that will sell for $5 or less, I generally won’t pay any fee, and will just have the item returned to me if free removals are available. Then I will donate or liquidate it.
On the items where the LTS fee is higher than my aforementioned threshold, I will evaluate each product individually to determine if a removal or paying the LTS fee makes more sense. I look at things like current selling price, competition, what season the product is most likely to sell in, how the product is currently selling, among other factors. Most of these items I will end up removing, and then either store in my warehouse to be sent back at a later date, or liquidate via other means.
By removing the items, I avoid the LTS fee and help to lower this particular expense.
One last note, as I am going through all of the items that are subject to long term storage fees, I am reviewing to see if there are ways I could improve my inventory mix to avoid these fees in the future. This is a very important step, as generally speaking, I don’t want to have more than a few months supply in stock at a given point in time.
We’ll wrap it up there for today. That’s my strategy for dealing with long term storage fees. Do you have any additional strategies you would recommend? any questions on this post? Let me know in the comments below
Subscribe to:
Comments (Atom)